Baking may be regarded as a science, but it’s the chemistry between the ingredients and the cook that gives desserts life. Baking is done out of love, to share with family and friends, to see them smile. ~Anna Olson
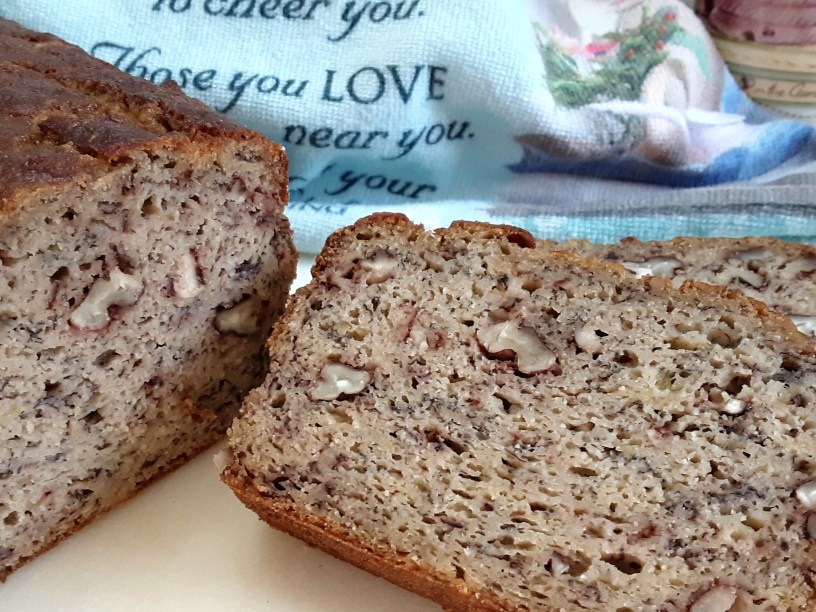
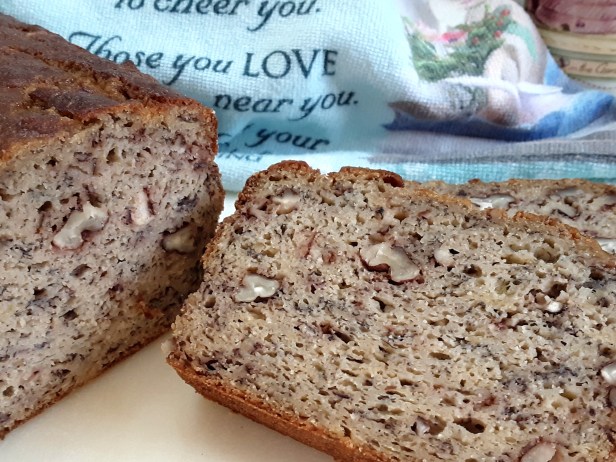
Let’s get right to the good stuff, yes? Backstory and tips follow the recipes. (The photograph is of the GF/DF version.)
High Altitude Banana Bread
- Preheat oven to 325°. Grease and flour a 9×5 pan.
- Cream:
1/3 c. shortening
1/2 c. sugar
2 eggs - Add:
3 ripe bananas, mashed (approx. 1 ½ c.) - Add:
2 c. flour (can sub 1/4 c. whole wheat if prefer)
1/2 rounded tsp. baking soda
1/4 tsp. salt - Add:
1/2 c. chopped pecans - Bake for 1 to 1 ½ hours (rotate halfway through), until a toothpick comes out clean.
- Let cool in the pan 10 minutes before serving, or finish cooling on a wire rack.
GF/DF High Altitude Banana Bread (Soy-Free and Refined Sugar-Free)
- Preheat oven to 325°. Grease and flour (with sifted oat flour) an 8 ½ x 4 ½ pan.
- In a stand mixer, cream:
1/4 c. palm shortening
1/4 c. maple sugar (SUGAR, not syrup) - Add:
5 eggs (Adding one egg at a time can help with the creaming. Mix on low until only small clumps of shortening/sugar are left.) - Add:
3 ripe bananas, mashed (approx. 1 ½ c.) - Sift together and add:
1/3 c. oat flour (Sift instead of whisk. Even the finest-ground oat flour can have a few groats that need to be removed.)
1/3 c. + 2 tsp. coconut flour
3 Tbsp. arrowroot powder
3/4 tsp. baking soda
1/4 tsp. salt
1/8 tsp. xanthan gum (optional; see FAQs) - Add:
1/2 c. chopped pecans - Pour into prepared pan, and smooth out batter.
- Bake for 55 to 70 minutes (rotate halfway through), until a toothpick comes out clean. (See last FAQ for more info.)
- Let cool in the pan 10 minutes before removing.
- Let cool completely on a wire rack before slicing. (The loaf can be sliced without trouble if warm, but the structure of the bread is sturdier when no longer hot.)
- Wrap and store in the refrigerator for three days, or wrap and freeze. (You can freeze individual slices or the intact loaf.)
Backstory
I love banana bread, but I only ever loved my mama’s recipe — not loaves that are too sweet, too oily, too cakey. I love banana bread that has just-right flavor. The kind you can slather with butter or dunk in hot cocoa and it will still offer the perfect chew.
I know: There are endless GF recipes out there for banana bread. Use ‘em if they work for you! I’ve tried several, though, and have been disappointed every time. I wanted a gluten-free counterpart that reminds me of the original.
So I had to step away from grain-free recipes. But I still wanted to keep things simple, with as few ingredients as possible. (Cross apple cider vinegar off the list; it didn’t help the rise. The acidity in the bananas and maple sugar interacts well enough with the baking soda.)
Oat flour gives heft without greasiness (too much fat being a concern with often-used grain-free subs like almond flour). And using palm shortening with a blend of gluten-free flours creates a light, moist, sturdy texture. Hot-cocoa-dunking test passed! See the FAQs below for a few tips if you try my version.
Two quick notes:
- Both recipes are for high altitude – we’re talking tested at 6,000 to 8,000 feet. If you live lower, you might simply try doubling the baking soda — or use these high altitude cooking and baking tips to play with opposite ideas for low altitude baking. Don’t worry: Test batches still taste good, and you’ll have a freezer full of snacks if it takes you a while to land on the right proportions. (Trust me!)
- You know your oven best. 325° works for me. But if your loaves (original and GF/DF) aren’t browning well or are taking a lot longer to cook than the recipes suggest, try 350°.
FAQs for GF/DF Version
What size should the bananas be?
Medium-large to large. Don’t tinker with the dry ingredients, regardless. In each loaf I’ve made, the amount of mashed banana was slightly different, but that never affected the results.
How ripe should the bananas be?
I like mine to be very ripe — dark brown/black spots all over. The more ripe, the sweeter and richer the flavor. Just be sure your bananas aren’t green.
If your bananas are ready but you aren’t: Freeze them in a baggie, either peeled or unpeeled, for later (thaw before baking).
If you’re ready but your bananas aren’t: Bake them in the peel at 350° for 15-20 minutes until they’re completely black. Peel and cool before using.
(Don’t worry about the extra liquid resulting from baked or frozen bananas; it won’t affect the final product.)
What about xanthan gum?
Xanthan gum helps a bit here with structure and stability. But if you don’t have any on hand or prefer not to use it, I think you’ll still love this recipe!
Why shortening instead of oil?
Shortening creates a more airy, less greasy-feeling loaf. But several banana bread recipes out there use liquid fat (e.g., melted coconut oil). It comes down to preference.
Why maple sugar?
The taste of coconut sugar was overpowering to me in this recipe. And liquid unrefined sweeteners like maple syrup and honey disrupted the bread’s final texture. They didn’t cream well with the shortening, and they added unwanted liquid.
Why so picky about using a stand mixer?
Because maple sugar is sweeter than cane sugar, we use half as much. And with a greater number of eggs, the creaming results are less blended than what you might be used to. So it’s tempting to use a food processor, but that emulsifies the shortening too much; you’ll end up with a dry, dense loaf.
Stick with the stand mixer, where you have more control over speed. Cream the shortening and sugar first, then add the eggs and scrape down the bowl often. Mix on low until only small clumps of shortening/sugar are left.
Why not let the batter rest before baking?
A lot of baked goods with gluten-free flours need to rest for 20 to 30 minutes to avoid a gritty end result. But when there’s a lot of moisture in a recipe (in this cases, the bananas) and the baking time is longer (think breads as opposed to cookies), we can skip the rest time.
How do I know when the loaf is cooked?
Strange but true: It’s possible for the loaf to be done in the center while the top needs a longer bake. So even when your toothpick comes out clean from testing the center, pay attention to the top. Can you see undercooked dough in the cracks? (You can use a toothpick to check the top, too!) Does the top of the loaf feel too soft? Bake five minutes more, then test again.
Happy eating!
© 2019 Carol Stillings
